|
Modifying the La
Maggiore Shells
For those of you home workshop types
who'd like to modify your shells, we bring you this success story
from our new friend and fellow shell aficionado Ulrich Glammeier
who lives (and plays) in Germany. His modified shells look great.
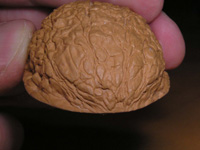
I was very impressed by the minimal amount of shell loss from
the sanding process. You'll also note how well the La Maggiore
shells take acrylic paint as well.
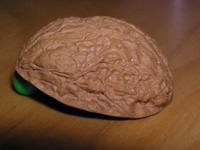
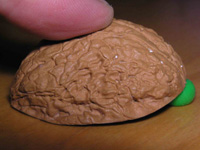
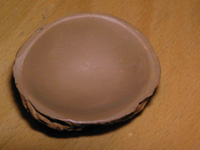
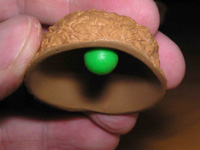
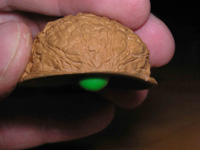
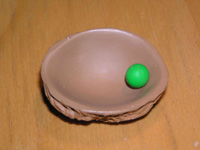
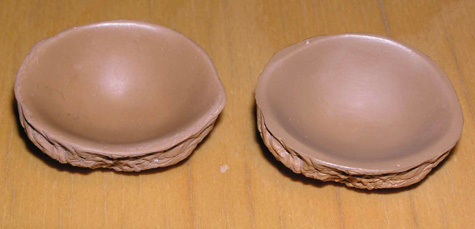
As attachments you find pictures of
my modified shells. You can see the added Chanin dip on the first
few pictures. Furthermore I "implanted" small magnets
(like in the School for Scoundrels Magnetic Street Shells) I
fixed them with wood putty and painted the interieur of the shells
with acrylic color for plastic models. They work similar to the
Magnetic Street shells except that you can also release the magnetic
pea by moving the shell forward and pressing on the front (thanks
to the Chanin Dip). On the last picture you cannot see the attached
pea in the lightly tilted shell.
How long would you say it took you
to modify the shells, and how did you go about it?
I did not need more than one hour to
modify one shell (without drying time for the putty and the paint).
How did you go about adding the Chanin
Dip?
I sanded the shells with very fine sandpaper
(put sandpaper flat on a table, tilt front side of the shell
slightly and apply pressure on the front side while carefully
sanding, repeat the same with the rear side). I tested the interim
results from time to time. At the and I rounded the edges of
the rim.
You also made added a magnetto each
shell, what type of magnets did you use and how did you modify
the shells?
I used Neodymium (rare earth) magnets
(cylindrical, approx. 3 mm Diameter, 1 mm height). I fixed them
with magicians wax inside the front interior of the shell to
find the right spot where the magnetic pea should stick to the
shell. It must be so that it is fixed to the magnet when put
down on the table/mat and moved forward and released when moved
forward with pressure on the front of the shell or moved backward.
This point is about 6 - 7 mm from the front rim. I marked that
point. Then I drilled a hole in (not through!) the shell at this
point a little larger than the magnet (i did that holding the
shell in the hand, drill press lying flat on the table with a
slow drilling velocity), put the magnet in the hole and closed
it with wood putty. I used a German brand (Faber "efaplast
holzy", modelling clay, similar to wood, air drying). After
the clay was hard I sanded the area with fine sand paper and
polished it with steel polish. Because the clay had not exactly
the same color like the shell I painted the interior of the shell
with water based acrylic paint (matte) for plastic models (three
coats).
Modifying my La Maggiore shells cost
me only a few bucks and a few hours of labour. If done carefully
it can be done by everbody (I have two left hands!).
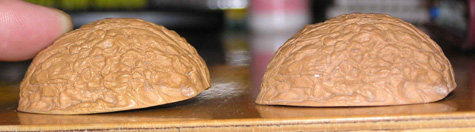
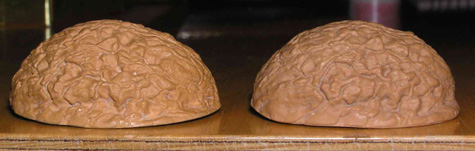
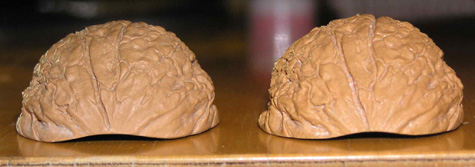
left: modified, right: unmodified
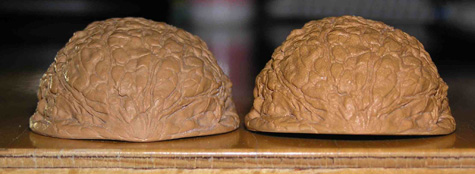
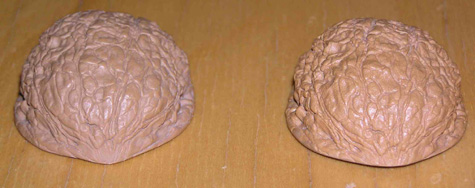
left: unmodified, right: modified
Special thanks to Ulrich for taking
the time to write up his process, take these photos and especially
for allowing me to share his work with you! |


